
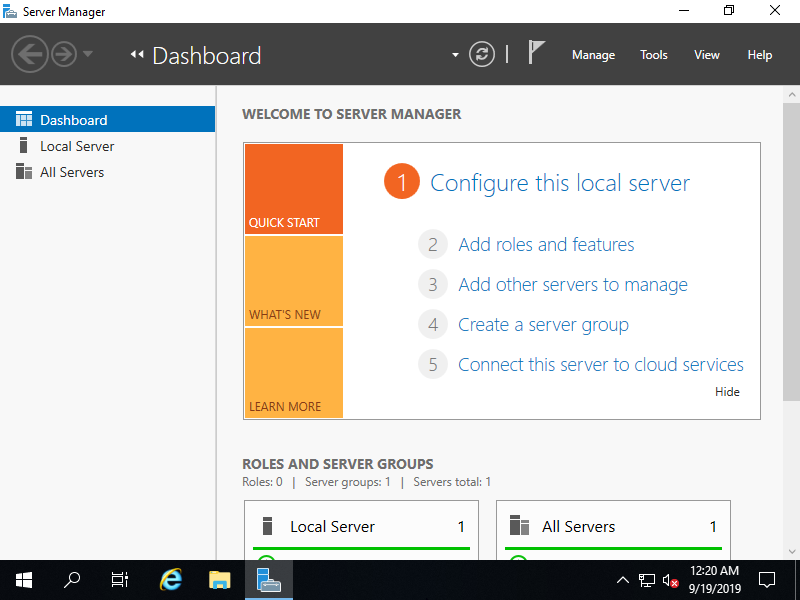
After installing Windows Server 2022 in VirtualBox, you need to perform an initial setup to configure the server for your needs. Here’s a guide to help you with the initial server setup:
1. Set Up Administrator Account
- Create Password: When the server restarts after installation, you’ll be prompted to set a password for the Administrator account. Choose a strong password and confirm it.
2. Install Updates
- Check for Updates:
- Open
Settings>Update & Security>Windows Update. - Click on
Check for updatesand install any available updates. - Restart the server if required after updates.
- Open
3. Configure Network Settings
- Set Static IP Address:
- Open
Server Managerand go toLocal Server. - Click on the
Ethernetlink next toIPv4 address assigned by DHCP. - In the
Network Connectionswindow, right-click on your network adapter and selectProperties. - Select
Internet Protocol Version 4 (TCP/IPv4)and click onProperties. - Set a static IP address, subnet mask, default gateway, and DNS servers.
- Open
4. Rename the Server
- Change Computer Name:
- In
Server Manager, go toLocal Server. - Click on the
Computer namelink. - In the
System Propertieswindow, clickChange. - Enter the new computer name and click
OK. - Restart the server to apply the changes.
- In
5. Configure Remote Desktop
- Enable Remote Desktop:
- In
Server Manager, go toLocal Server. - Click on the
Disabledlink next toRemote Desktop. - Select
Allow remote connections to this computer. - Apply and confirm the changes.
- Optionally, specify which users can connect remotely.
- In
6. Install Roles and Features
- Add Roles and Features:
- In
Server Manager, click onManage>Add Roles and Features. - Follow the wizard to install the necessary roles and features for your server. For example, if you want to set up a web server, you can install the
Web Server (IIS)role.
- In
7. Configure Windows Firewall
- Open Required Ports:
- Open
Windows Firewall with Advanced Security. - Create inbound and outbound rules to allow traffic for necessary services. For example, you may need to allow HTTP (port 80) and HTTPS (port 443) if you are setting up a web server.
- Open
8. Set Up Storage
- Configure Disks:
- Open
Server Manager>File and Storage Services>Disks. - Initialize and format any additional disks as needed.
- Create volumes and assign drive letters or mount points.
- Open
9. Set Time Zone
- Change Time Zone:
- Open
Settings>Time & Language>Date & Time. - Set the correct time zone for your location.
- Open
10. Join a Domain (Optional)
- Join Domain:
- If your server needs to be part of a domain, go to
Server Manager>Local Server. - Click on the
Workgrouplink. - Click on
Changeand selectDomain. - Enter the domain name and credentials to join the domain.
- Restart the server to apply the changes.
- If your server needs to be part of a domain, go to
11. Configure System Settings
- Adjust Performance Settings:
- Right-click on
This PCand selectProperties. - Click on
Advanced system settings>Performance>Settings. - Adjust for best performance or best appearance according to your needs.
- Right-click on
- Set Power Plan:
- Open
Control Panel>Power Options. - Choose a power plan or create a custom plan that suits your server’s requirements.
- Open
12. Security Settings
- Configure Security Policies:
- Open
Local Security Policyfrom the Start menu. - Set policies for account lockout, password complexity, user rights assignments, etc.
- Open
- Install Antivirus Software:
- Install and configure antivirus or endpoint protection software to secure your server.
13. Backup Configuration
- Set Up Backups:
- Configure Windows Server Backup or a third-party backup solution to regularly back up your server data.
By following these steps, you’ll have a well-configured Windows Server 2022 ready for deployment in your environment. If you have specific requirements or need additional configurations


